
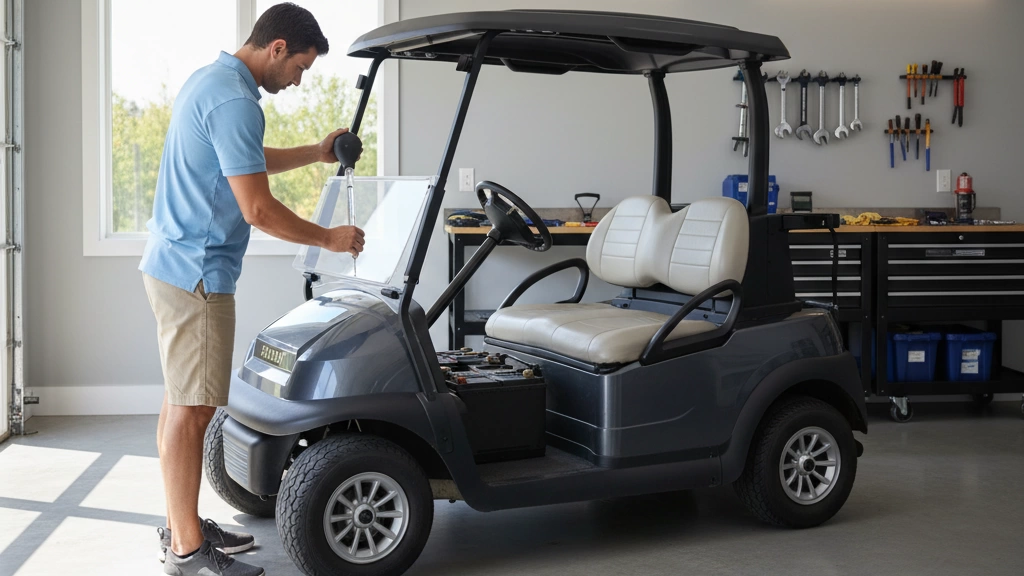
Visual Inspection – The First 60-Second Check
Before you grab any tools, start with a quick visual inspection of your golf cart batteries. This simple step takes just about a minute but can save you a lot of headaches down the road.
What to Look For:
- Corrosion on terminals: White or greenish powdery buildup around battery terminals is a common sign. It can block electrical flow and cause charging issues.
- Leaks and fluid stains: Check for any wet spots or crusty deposits around the battery case. Leaking acid is dangerous and means the battery is probably toast.
- Bulging or cracked cases: If the battery case looks swollen or has visible cracks, it’s a red flag signaling internal damage or overheating.
- Terminals and cable connections: Make sure all cables are tight, clean, and free of frayed wires or rust. Loose or damaged connections can mimic a dead battery.
- Water levels (for flooded lead-acid batteries): If your golf cart uses flooded batteries, peek inside to see if the water level covers the plates. Low water means the battery won’t charge properly and could get permanently damaged.
Taking these few seconds to double-check your batteries visually keeps you ahead of potential problems and ensures you’re not testing a battery with obvious, avoidable issues. Think of it as a quick “green on the fairway” check before the deeper rounds of testing.
Resting Voltage Test (Multimeter Method)
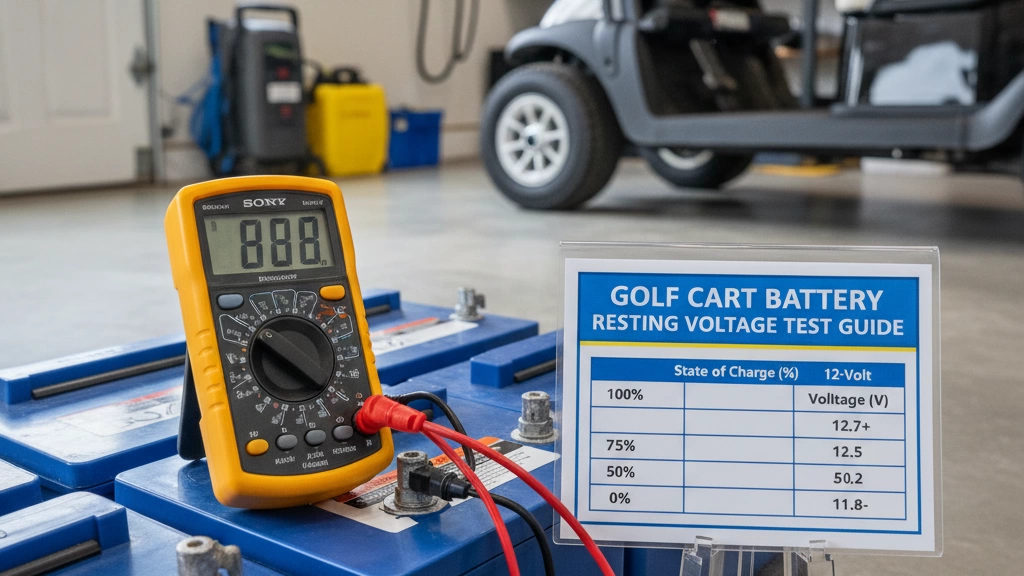
A resting voltage test is one of the easiest ways to check your golf cart batteries using a multimeter. But first, what’s a “rested” battery? It means your batteries have been off the charger and at rest for at least 12 to 24 hours. This resting period allows the voltage to stabilize, giving you an accurate baseline reading.
Voltage Chart for Common Golf Cart Batteries
Here's what you should expect for fully charged batteries at rest:
| Battery Type | Fully Charged Voltage | Weak Voltage | Dead Voltage |
|---|---|---|---|
| 6V Battery | 6.3V or higher | 6.0V to 6.2V | Below 6.0V |
| 8V Battery | 8.4V or higher | 8.0V to 8.3V | Below 8.0V |
| 12V Battery | 12.6V or higher | 12.0V to 12.5V | Below 12.0V |
For full battery packs, like 36V, 48V, or 72V systems, multiply the per-battery voltage by the number of batteries in the pack:
- 36V pack (6x6V batteries): Fully charged ~37.8V, weak ~36.0-37.7V, dead below 36V
- 48V pack (6x8V or 8x6V batteries): Fully charged ~50.4V, weak ~48.0-50.3V, dead below 48V
- 72V pack (12x6V batteries): Fully charged ~75.6V, weak ~72.0-75.5V, dead below 72V
How to Interpret Results
- Good batteries will hold their resting voltage near or above the fully charged level.
- Weak batteries show voltage slightly below fully charged and may struggle under load.
- Dead batteries have a resting voltage well below recommended levels and usually need replacement.
Using this simple multimeter resting voltage test helps you spot issues early, especially if you’re seeing drops in runtime or sluggish golf cart performance. For detailed testing equipment that can also handle load tests, look into professional battery testers available on sites like ProPow Energy, which specialize in golf cart battery maintenance solutions.
Load Testing – The Most Accurate Way
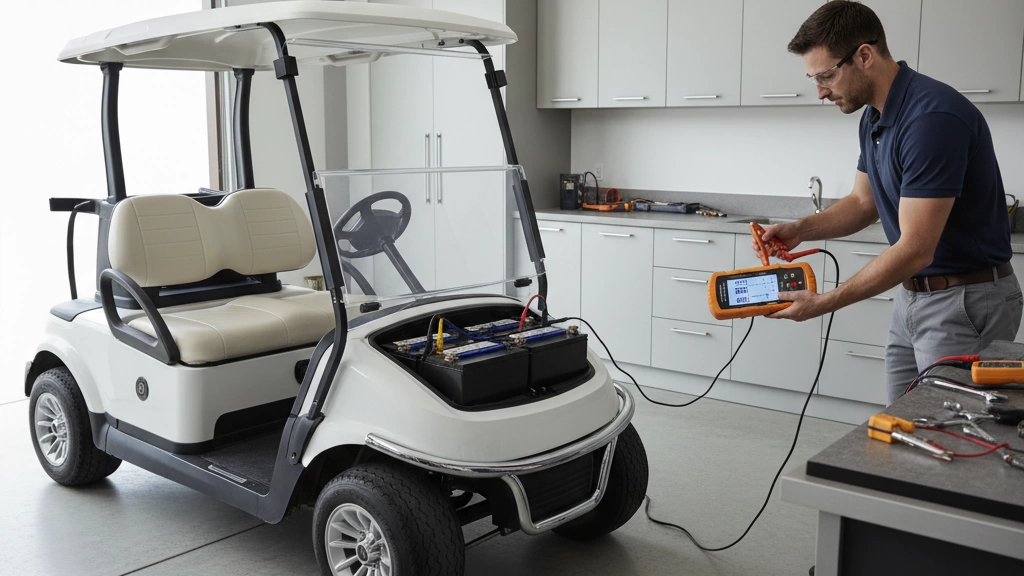
Resting voltage tests can give you a quick idea, but they don’t tell the whole story — a battery might show a decent voltage yet fail under real-world loads. That’s why load testing is the most reliable way to check golf cart batteries.
To do a load test, you’ll need a handheld carbon-pile or digital load tester. These devices simulate the battery’s actual working conditions by putting a load on it, usually about half the battery’s Cold Cranking Amps (CCA) rating, for 10 to 15 seconds. This stress tells you if the battery can hold steady voltage under pressure or if it sags too low, signaling weakness.
Here’s what to watch for during a load test:
- Proper load: About 50% of the battery’s CCA rating (check your battery specs)
- Test duration: Hold the load for 10–15 seconds
- Pass/fail voltage: A healthy 6V battery, for example, should stay above ~5.25 volts under load — lower means it’s time to replace
You can buy load testers online or at local auto or golf cart shops. If it’s a one-time check, some stores and repair centers also rent them out.
For golf cart owners looking to keep things simple but precise, mastering load testing is key to avoiding unexpected battery failures on the course. For more tips on managing battery health, check out our in-depth guides on golf cart battery maintenance tips.
4. Hydrometer Testing (Flooded Lead-Acid Only)
Hydrometer testing is a simple, reliable way to check the health of flooded lead-acid golf cart batteries. It measures the specific gravity of the electrolyte inside each cell, showing how much charge the battery holds.
How to Test with a Hydrometer
- Safety first: Wear gloves and eye protection. Battery acid can be dangerous.
- Remove the battery cell caps carefully. Don’t spill the electrolyte.
- Insert the hydrometer’s suction bulb into the cell and draw up the electrolyte.
- Check the specific gravity reading on the hydrometer scale.
- Record the reading and then return the electrolyte to the cell.
- Repeat for every cell in the battery.
Specific Gravity Reading Chart
| Specific Gravity | Battery Charge Level |
|---|---|
| 1.275 or higher | Fully charged |
| 1.190 - 1.200 | About 50% charged |
| 1.100 or below | Sulfated or heavily discharged |
Spotting a Single Bad Cell
- Compare readings across all cells in the battery.
- A bad cell will have a significantly lower specific gravity than the others, often below 1.100.
- Uneven readings often mean sulfation or internal damage in one cell.
- A single bad cell can seriously affect overall battery performance and signal it’s time to repair or replace.
Hydrometer testing gives a clearer picture than just voltage checks and helps catch hidden issues early in your golf cart battery maintenance routine. Remember, this method works only for flooded lead-acid batteries, not sealed AGM or lithium types.
5. Discharge / Capacity Test (Advanced)
For a deeper look at your golf cart batteries’ health, a discharge or capacity test is the way to go. This test measures how much charge your battery can actually hold and deliver under real conditions.
How to Do It:
- Professional Battery Analyzer: This device simulates a real load and tracks how long the battery holds up before dropping to a cutoff voltage. It gives accurate, detailed results on battery capacity and state-of-health.
- DIY with Resistor Bank: If you don’t have a tester, you can create a load with a high-wattage resistor and measure voltage over time. This method needs some care and basic tools but can still show you if your battery is losing power fast.
- Real-World Runtime Test: Another simple approach is to run your golf cart on a full charge and time how long it lasts during typical use on the course. Compare this to the original run time for clues about capacity loss.
When to Replace:
- A good rule of thumb is to consider replacement once your battery holds less than 75% of its rated capacity. This means if your battery’s runtime or tested capacity drops below that mark, it’s probably time for a new set.
Doing a discharge test helps you avoid surprises out on the course and makes sure your golf cart batteries are up for the job when you need them most.
Common Mistakes That Give False Readings
When testing golf cart batteries, some common mistakes can lead to wrong results. Here’s what to watch out for:
-
Testing Right After Charging:
Checking voltage immediately after charging gives a falsely high reading. Let the battery rest for 12–24 hours to get an accurate “resting voltage” measurement.
-
Dirty Terminals:
Corrosion, dirt, or loose connections on battery terminals can affect readings. Always clean and tighten terminals before testing.
-
Wrong Load Value:
Using too much or too little load during a load test can give misleading results. The load should be about half the battery’s CCA (Cold Cranking Amps) rating for 10–15 seconds.
-
Ignoring Temperature Correction:
Battery voltage changes with temperature. Test results should be adjusted if you’re testing in extreme cold or heat for an accurate health check.
Avoid these to keep your golf cart battery testing reliable and get the true picture of your battery’s health.
7. Lead-Acid vs. Lithium – Testing Differences
Testing golf cart batteries depends a lot on the type you have. Lead-acid batteries (like flooded or AGM) need more hands-on testing, while lithium golf cart batteries, especially LiFePO4, behave differently.
Why Lithium Batteries Don’t Need Load Testing Often
- Modern lithium batteries have built-in Battery Management Systems (BMS).
- The BMS constantly monitors battery health and balance.
- Voltage stays steady even under load, so load testing rarely reveals issues.
- Most problems trigger BMS error codes instead of obvious voltage drops.
When Lithium Batteries Actually Fail
- Cell damage from physical impact or extreme temps
- BMS failure or electronic faults
- Significant capacity loss after many charge cycles
- Sudden voltage drops or inability to hold charge
Table: Lead-Acid vs. Lithium Testing Needs
| Test Method | Lead-Acid Batteries | Lithium Batteries (LiFePO4) |
|---|---|---|
| Visual Inspection | Must check for leaks, corrosion | Usually sealed, less visible issues |
| Resting Voltage | Key for assessing health | Useful but less telling alone |
| Load Testing | Essential for true condition | Rarely needed due to BMS |
| Hydrometer Testing | For flooded only | Not applicable |
| BMS Monitoring | N/A | Primary method for status and warnings |
In short, if you have a lithium golf cart battery, watching BMS error codes and doing simple voltage checks usually covers all your bases. For lead-acid batteries, regular load testing and inspecting water levels remain crucial.
When to Replace Instead of Revive
Sometimes trying to fix old golf cart batteries isn't worth the hassle or money. Here’s a quick look at when to choose replacement over revival:
-
Cost vs. Benefit: Trying to revive worn-out batteries can cost nearly as much as buying new ones, especially after multiple attempts. A fresh battery set often means better performance and longer life, saving money in the long run.
-
Average Lifespan: Lead-acid batteries usually last 4-6 years, while lithium batteries (like PROPOW 48V lithium) can last 8-10 years or more. If your batteries are near the end of these ranges and showing signs of weakness, replacement is the smarter move.
-
Why Upgrade to PROPOW 48V Lithium: PROPOW lithium batteries are a solid upgrade. They hold charge longer, weigh less than traditional lead-acid batteries, and require less maintenance. Plus, they deliver steadier power, which keeps your golf cart running smoother on the course.
Bottom line: If your batteries are old, struggling to hold charge, or you want fewer headaches, switching to a PROPOW 48V lithium battery pack makes more sense than patching up old lead-acid batteries.
Quick FAQ: Golf Cart Battery Testing
How often should I test my batteries?
Check your golf cart batteries every 3 months if you use your cart regularly. For less frequent use, twice a year is enough. Routine testing helps catch issues early before they affect performance.
Can a bad single battery ruin the whole pack?
Yes. One weak or dead battery can drag down the entire 36V, 48V, or 72V pack’s performance. It can cause uneven charging and shorten the life of the other batteries. Always test individual cells to spot the problem early.
Do I need to disconnect batteries to test?
You don’t have to disconnect the pack for a quick resting voltage test with a multimeter. But for load tests, hydrometer readings, or deep diagnostics, disconnecting batteries one at a time gives the most accurate results.
Post time: Nov-28-2025


